Thursday, May 13, 2010

week 4 - guidance is good

What a difference a class makes. Those 3 paintings I worked on at home and wasn't too happy about...I worked on today at Shilo's studio and they look SO different and IMPROVED. I'm getting there. That's the good news. The bad news is that I don't think I could have done it without Shilo's help and suggestions. She says that comes with mileage. I hope so. Anyway, I always feel pretty good after class, like I'm making progress and learning something.

I'm finally understanding what Shilo said last fall about "push and pull" regarding the darks and lights from the overlapping layers. I got to use my Oil Sticks and that was kind of interesting. I recognized that I need a wider brush. Also, Shilo keeps reminding me to let go of the fear and go wild. That DOES seem to help!


For "Foxglove" which I was worried was getting too representational, Shilo had me turn it sideways and work on the floor (as opposed to on the easel.) That helped a lot. It's looking better. Almost there. Needs some light silvery and blue greens.


And I was not happy that the 3 paintings were looking quite alike, palette-wise. Well, "Beets" certainly has taken a departure from the others. Maybe too much so. I probably need to add back the reds and violets over most of that orange. And it looks like I lost a lot of the darks. Will have to work on that too.


Didn't get to work too much on "Red Chard" but just by putting a few large strokes across the vertical "stalks" it has changed quite a bit. Also added a bigger patch of violet and lots of shades of purple. Need to put on the greens next.

Tuesday, May 11, 2010

painting at home

I took home "Foxglove", "Beets" and "Red Chard" to work on at home after the 3rd session. I had a heck of a time when I added Titanium White for "Foxglove". Everything looked very chalky and opaque. So I scraped or wiped most of it off. I decided to try adding Liquin to make it more transparent. It was okay, but thicker, so I had to scrape off the drips. Still not quite sure how to handle the opaqueness. Maybe paint thinned out magenta over the opaque "white"? I'll have to try that after the paint dries. Also, I'm concerned that it is looking rather representational, so I need to change that.


For "Beets" I added more burgundy/brown and olive green and ochre. It's looking very dense (as opposed to "airy" and very dark. I guess the next step will be to add in lights?


Didn't do too much to "Red Chard" and, as a result, I like it best of the three! It still has that fresh look. I only added a few long "stalky" strokes in magenta and a few dark burgundy patches. I think the next step is to add more greens.

Not too happy with these 3. They still all look kind of the same, in terms of color palette. They haven't developed into their own painting the way the other 3 have. I guess when I paint at home (without Shilo), I don't feel that "at home" painting.

Thursday, May 6, 2010

week 3 --medium value

For our third session, Shilo had me work on one painting at a time and using thicker, but still turp/paint mixture, a little thicker than the very thin wash.

I worked on "Snapdragon", putting in the burnt orange, apricot, and peach. It is looking kind of muted because of the wet on wet. Putting in the few spots of light yellow helped it a bit. Definitely, using DIFFERENT SIZED BRUSHES is something I need to keep in mind all the time. Vary the brush size. Vary the color.

After an hour of painting and listening to my iPod, it was clear I needed to step away from the canvas and move on to the next one. (I listened to Diana Krall, which seemed right for the sultry, romantic mood I was going for.)


Next, I worked on "Hakonechloa, Variegated Geranium and Blue Ajuga". Mostly I put in the red violets, rusty brown and a few golden tan accents. (For some reason, the picture is sideways.) For this one, I listened to the Rolling Stones, because these plants remind of tropical HEAT and a more primal energy. I am pretty happy with the big brush strokes of brown. It felt good when I did them!

For the last hour of class I worked on "Maple tree and Iris". I was going for the purples, lilacs and violet hues. Also put in magenta and burgundy touches. It's kind of wild (Stones again.) Probably should have listened to something calmer for this one!

The good thing is that the paintings are starting the diverge from each other, developing into distinct paintings. And, definitely, they still look nature-inspired. I'm glad that so far, I've been able to fulfill my goals for these lessons: stick to the "intent", keep it abstract, learn how to use oil paints.

Shilo says she is making me do it in stages (turp wash, darks, thicker medium values, etc.) so that I don't get overwhelmed. As I get more experience and confidence, it will be more intuitive, I guess. We shall see.

Friday, April 30, 2010

week 2--painting in the darks


For the second painting class, I selected 3 of the 6 canvases to work on. This time I had the photos printed and taped them next to each painting for palette reference. I decided to work on "Beet", "Foxglove" and "Red Chard" (for lack of better title) because they all had in common the reds and violets and I thought that would simplify my color mixing.

Shilo guided me with mixing the paint in buckets--how little paint to use vs. how much turpenoid; then split this between 2 or 3 buckets for similar color families, etc. Sounds basic, but this is all new to me, this way of abstract painting.

The day's task was to develop the paintings by putting in the darks. I mixed blue greens, olive greens, dark purple violets and red violets. I also mixed a little bit of dark brownish violet (mixed some blue green into the red violet) for the shadows of the foxglove. Here they are, after Week 2. They all kind of look the same at this point. I still am not sure what they will end up looking like, stylistically, by the last class (Week 6) but I like the abstractness so far, and they still look inspired by nature.

"Foxglove"

"Red Chard"

"Beets"

I took the other 3 canvases home and worked on them that night. Again, for lack of better titles, I'll refer to them as "Snapdragon", "Maple and Iris" and "Hakonechloa, geranium and blue spikes". Shilo said I should just name them "1" through "6", but for me, the plant names help me visualize color palette.


"Snapdragon"


"Maple tree w/ blue iris"


"Hakonechloa, geranium and blue spikes"

Friday, April 23, 2010

back to nature

I started private lessons with Shilo Ratner at her studio.
I brought over 6 canvases--four 24x24 and two 18x24.
We looked at the photos I took of my garden, as starting point for "inspiration" and compositional ideas. The idea is to focus on a color palette for each painting and stick to an "intent".

I mixed 3 different washes of greens and used 3 different sized brushes. Then I splattered, dripped, scraped and wiped, trying to vary the strokes as much as possible.

After some drying time, I worked on four of the canvases, leaving 2 to dry more so I could take them home to work on.

I decided that one would be inspired by the purple/violet leaves of BEETS.


The second one would be inspired by the pink/red stems of my CHARD.


The third one would have the apricot/rose colors of my SNAP DRAGON.


And the last one would be based on the purple/lilac colors or my FOXGLOVE.


Photos of the 18x24 should be vertical (use your imagination!)

For the 2 canvases that I brought home, I decided they would be inspired by my front garden plantings.

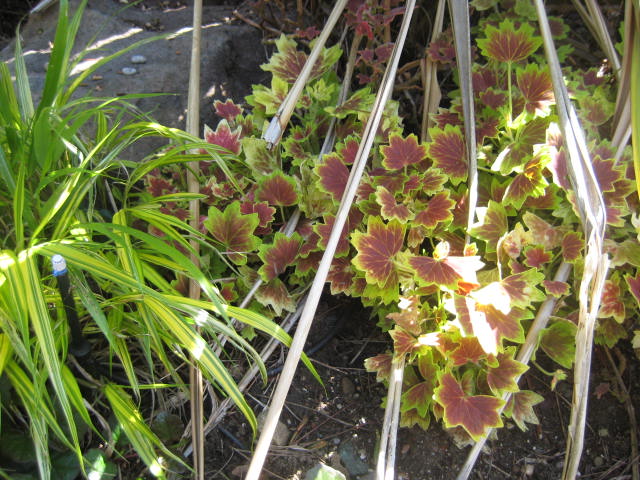
One is based on my yellow striped Hakonechloa grass, variegated geranium (chartreuse and burgundy) and Ajuga muscari (purple leaves with blue spikes)


The other is based on my wild irises (purple) and red maple.


This is Stage 1. They are looking garden-y, which is my intent, but I also want to keep them very abstract.

Wednesday, April 21, 2010

Encaustic workshop

I took an encaustic workshop with Eileen Goldenberg recently. It was from 10-4 and it was FANTASTICALLY FUN. I am a long way from perfecting the technique (still have lots of bubbles) but I certainly enjoyed the instant gratification of not having to wait for paint to dry! Eileen showed us lots of techniques (sgraffito, using wire mesh, copper pipes, tracing paper, photo transfer, embedding objects, gilding, etc. And the EASY clean-up was another bonus!

I went out and bought an electric pancake griddle and a heat gun that very day. The next day, I went to SF and got plywood from Discount Builders Supply, 5# of beeswax from Douglas and Sturgess (that'll last a while) and encaustic gesso from Dick Blick. Now all I need is Damar resin.

I can see how one could get very meticulous and "crafty" in terms of the technique. It seems like it could be very "Zen"and addictive--something that I could be doing into the wee hours.

Here are the 2 pieces I made at the workshop.

Saturday, February 20, 2010

why stop when you are having fun?


Another "work in progress". One day I will actually finish a painting. This one needs more editing.